Pages

Showing posts with label gift card. Show all posts

Beary Gift Card


One of the regular attendees in my classes loves gift card holders.  I always try to make at least one card that can include a gift card.  This sample was fun to make, and it's actually made from an envelope!  Frenchie Stamps created a youTube video to explain how to make this cute card that worked great for the Beary Christmas Paper Packet.  The Beary wreath is a fussy cut out Picture My Life card from the paper packet, attached to the Cranberry belly band.  The inside sentiment, "Happiest HOLIDAYS", was stamped on a different Picture My Life card (right side with the snowflakes and trees).  When you pull out the Cranberry insert, it is easy to add a gift card for the recipient.


Coffee Cup gift card


Everyone needs gift card holders for Christmas, so I always try to offer at least one gift card holder in the workshop.  This year, I thought the coffee cup gift card was a  cute idea to try.  The front of the card uses Kraft cardstock, using the Stripe embossing folder to create the cardboard sleeve.  One of the zip strips from the City Sidewalks creates a nice ring around the sleeve.  The sentiment is a stamped sticker from the City Sidewalks Complements.


The cute part is the cup lid pulls out the gift card for the recipient.  It tucks neatly inside the bottom of the cup.  The back of the cup is used for signing your name.  The whole card is an A2 size, so it fits in a normal envelope.


Santa's Wallet


Santa's Wallet is a cute card that I've seen throughout Pintrest and the web. It's a super easy card, and was also easy to make into a gift card.  The card base is a solid Cranberry Cardstock and the belt is solid Black Cardstock.  The belt buckle is a Cricut cut in CTMH's glitter paper, with a Bitty Sparkle in the center.  The center of the gift card is two simple pockets on left and right.  One side is a sentiment card to sign, while the other is the place for the gift card.


Gift Card Ornaments


The White Pines Cardmaking Workshop has a set of double-sided B&T paper.  One side was really easy to use and subtle.  The other one was brighter, and more difficult to utilize.  I thought about how to tame it down, and this card is the result.  With all of the white space from the card base, it helps to keep the focus on the ornaments, without being overwhelming.  And it is super easy too!  I cut two flat ornaments, and made one 3-d ornament.  The 3-d ornament is three circles cut the same size, folded in half, and glued together.  I edged all of the circles in Cranberry ink to make them pop even more.  The Fern Twine from the kit made perfect hanging strings.


Around the holidays, we tend to send out gift cards a lot. We have a lot of family scattered around the country, so gift cards are always going to be easier than large presents.  This gift card is easy to make  I use a toilet paper roll inside a normal A-2 card, gluing the end of the toilet paper roll so the gift card can only slide part of the way in and not get lost.  Then punched a half circle in both the toilet paper and the card base.  Finally, the toilet paper roll was glued inside the card and the card completely glued closed.  This card doesn't open like a traditional card.  The card giver can sign the back, and the whole thing fits in a normal envelope.  Pretty neat way to recycle empty toilet paper rolls!

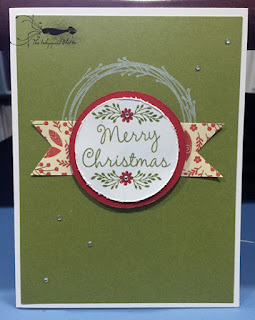
Merry Christmas Fab Friday Gift card


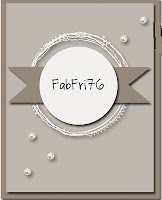
Even though the week is over, this Fab Friday sketch was fun to use with the wreath in the White Pines Cardmaking WOTG.  The little Bitty Sparkles fit right in as part of the layout.  I stamped the wreath image using pigment White Daisy and heat set first.  The white circle was stamped with Fern and Cranberry ink.  The Bitty Sparkles are the center of the flowers.  The whole thing is attached to the Fern Cardstock with 3-d Foam tape. 


The inside is a holding place for a gift card.  I used two regular A-2 card bases.  I scored one of the sides of each card and glued them together, leaving the center area without adhesive (someplace for the gift card to sit in).  Using a circle punch, I cut out the center notch to make it easier to pull out the card.  Decorate the inside as you wish.

Check out other ideas using this sketch by clicking on the image below.

http://fabfridaystampinchallenge.blogspot.com/2015/10/fab-friday.html

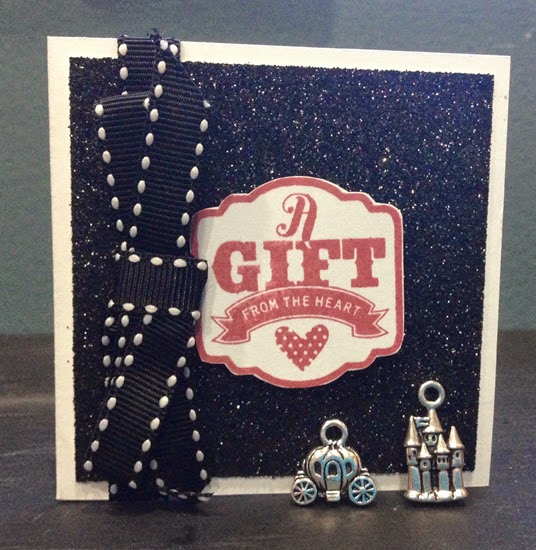
Glitter Gift Card


Sometimes a project just needs it. You know what I am talking about. It's shiny, happy, sometimes get stuck to your cat. Luckily, we can get this great shiny effect using CTMH glitter paper without all the mess. And even better, it is easy to cut on the Cricut! 

http://inkysquid.ctmh.com/Retail/Search.aspx?SearchValue=glitter+paper 

 This card is a nice gift card size, 3" X 3".  The sentiment was stamped on a cut-out from the Cricut.    The Artiste Cricut Cart makes many different sizes of different envelopes and can make them small enough for this card.  

Check it out, See...SHINY!


 A tradition with convention are charms.  I love to seek out a charm that will remind me of each convention that I attend, and share with my roomies.  This year, my upline, Gail, surprised us with a princess pumpkin and castle!  Awesome, yes!

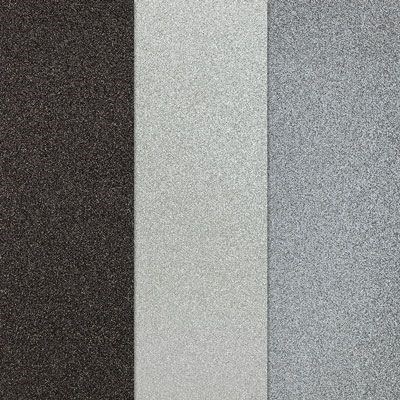
Glitter Paper

FMS: Explore Your World


 Freshly Made Sketches this week put up a perfect sketch for a card I wanted to make for the son of my husband's friend.  He just graduated from high school, and decided to live at home while going to college.  We decided to get two gas cards to help him get back and forth to school.   The front image "Explore Your World" is a stamp from the Timberline Scrapbooking Workshop on the Go.


I rotated the FMS design and used dimensional adhesive to lift up the front enough to hide the two gift cards.  I attached Cocoa ribbon to the cards to make it easier to pull them out.


The inside sentiment is from the Congrats Graduate set and the Banner Wishes set.  If you can't tell, the Banner Wishes set is my absolute favorite stamp set with perfect size fonts for card fronts or inside sentiments.

http://freshlymadesketches.blogspot.com/2014/05/freshly-made-sketches-138-sketch-by-jen.html